함수형 인터페이스와 람다 표현식은 자바에서 함수형 프로그래밍을 할 수 있게 해주는 초석이다. 하지만 이들은 반드시 함수형 프로그래밍 만을 위해서 사용하라는 법은 없다.
함수형 인터페이스
추상 메서드가 하나만 존재하는 것이 함수형 인터페이스 이다.
|
1
2
3
4
|
public interface RunSomething {
void doIt();
}
|
cs |
여기서 추상 메서드는 abstract가 생략되 있으므로 반드시 구현채를 구현해야 한다. 또 한 함수형 인터페이스는 default method, static method를 사용할 수 있다. 함수형 인터페이스를 구현할 때는 자바가 제공하는 @FunctionalInterface annotation을 사용한다.
|
1
2
3
4
5
6
7
8
9
10
11
12
13
14
15
|
@FunctionalInterface
public interface RunSomething {
/**이름을 출력한다*/
static void printName() {
System.out.println("YunkiKim");
}
/**나이를 출력한다*/
default void printAge() {
System.out.println("23");
}
void doIt();
}
|
cs |
이제 이 함수형 인터페이스를 사용해 보자. 예전에는 익명 내부 클래스를 사용해서 다음과 같이 사용을 해야 됬다.
|
1
2
3
4
5
6
7
8
9
10
11
|
public class Foo {
public static void main(String[] args) {
RunSomething runSomething = new RunSomething() {
@Override
public void doIt() {
System.out.println("hello");
}
};
}
}
|
cs |
하지만 java8부터는 람다 함수를 사용해 다음과 같이 코드를 줄일 수 있다.
|
1
2
3
4
5
6
|
public class Foo {
public static void main(String[] args) {
RunSomething runSomething = () -> System.out.println("hello");
}
}
|
cs |
함수형 인터페이스 내의 추상 메서드의 구현채가 여러줄이면 다음과 같이 작성하면 된다.
|
1
2
3
4
5
6
7
8
9
|
public class Foo {
public static void main(String[] args) {
RunSomething runSomething = () -> {
System.out.println("hello");
System.out.println("lamda");
};
}
}
|
cs |
람다 표현식을 사용하면 마치 다른 언어에서 함수를 정의 하는 듯 보인다(JS에서의 arrow funtion처럼). 하지만 자바에서 람다 표현식은 특수한 형태의 객체이다. 함수형 인터페이스를 inline으로 구현한 객체이다. 또 한 자바는 OOP이기 때문에 위 코드는 이 객체를 runSomthing이라는 객체에 할당을 한것이다.
결론적으로 자바에서도 JS처럼 함수를 first class object로 사용할 수 있다.
자바에서의 함수형 프로그래밍
함수를 first class object로 사용할 수 있다.
순수 함수:
동일 인자를 주었을 때 항상 같은 값을 반환하는 함수
외부 상태에 영향을 주지 않는 함수(부수 효과가 없는 함수)
고차함수: 함수가 함수를 매개변수로 받을 수 있고 함수를 리턴할 수 있다.
불변성
순수 함수의 예:
|
1
2
3
4
5
6
7
8
9
10
11
12
13
14
|
@FunctionalInterface
public interface RunSomething {
int doIt(int number);
}
public class Foo {
public static void main(String[] args) {
RunSomething runSomething = (number) -> number + 10;
System.out.println(runSomething.doIt(1));
}
}
|
cs |
자바에서 기본적으로 제공하는 함수형 인터페이스
자바에서는 기본적으로 제공하는 함수형 인터페이스가 존재한다. 이런 인터페이스를 사용할 경우 굳이 위와 같은 방식을 사용해 함수형 인터페이스를 정의하지 않고도 람다 만으로 간편히 사용할 수 있다. 자바가 기본적으로 제공하는 함수형 인터페이스는 java.util.function에 정의되 있다.
Function<T, R>
Function은 interface Function<T, R>의 형태를 가지고 T는 파라미터의 타입, R은 반환값의 타입이다.
apply
Function 내부에는 apply라는 하나의 파라미터를 받아 값을 반환하는 추상 메서드가 존재한다. 따라서 다음과 같이 implements해서 사용할 수 있다.
|
1
2
3
4
5
6
7
8
|
public class Plus10 implements Function<Integer, Integer> {
@Override
public Integer apply(Integer integer) {
return integer + 10;
}
}
|
cs |
또는 람다 표현식을 사용해 다음과 같이 사용할 수 있다.
|
1
2
3
4
5
6
7
|
public class Foo {
public static void main(String[] args) {
Function<Integer, Integer> plus10 = (number) -> number + 10;
System.out.println(plus10.apply(1));
}
}
|
cs |
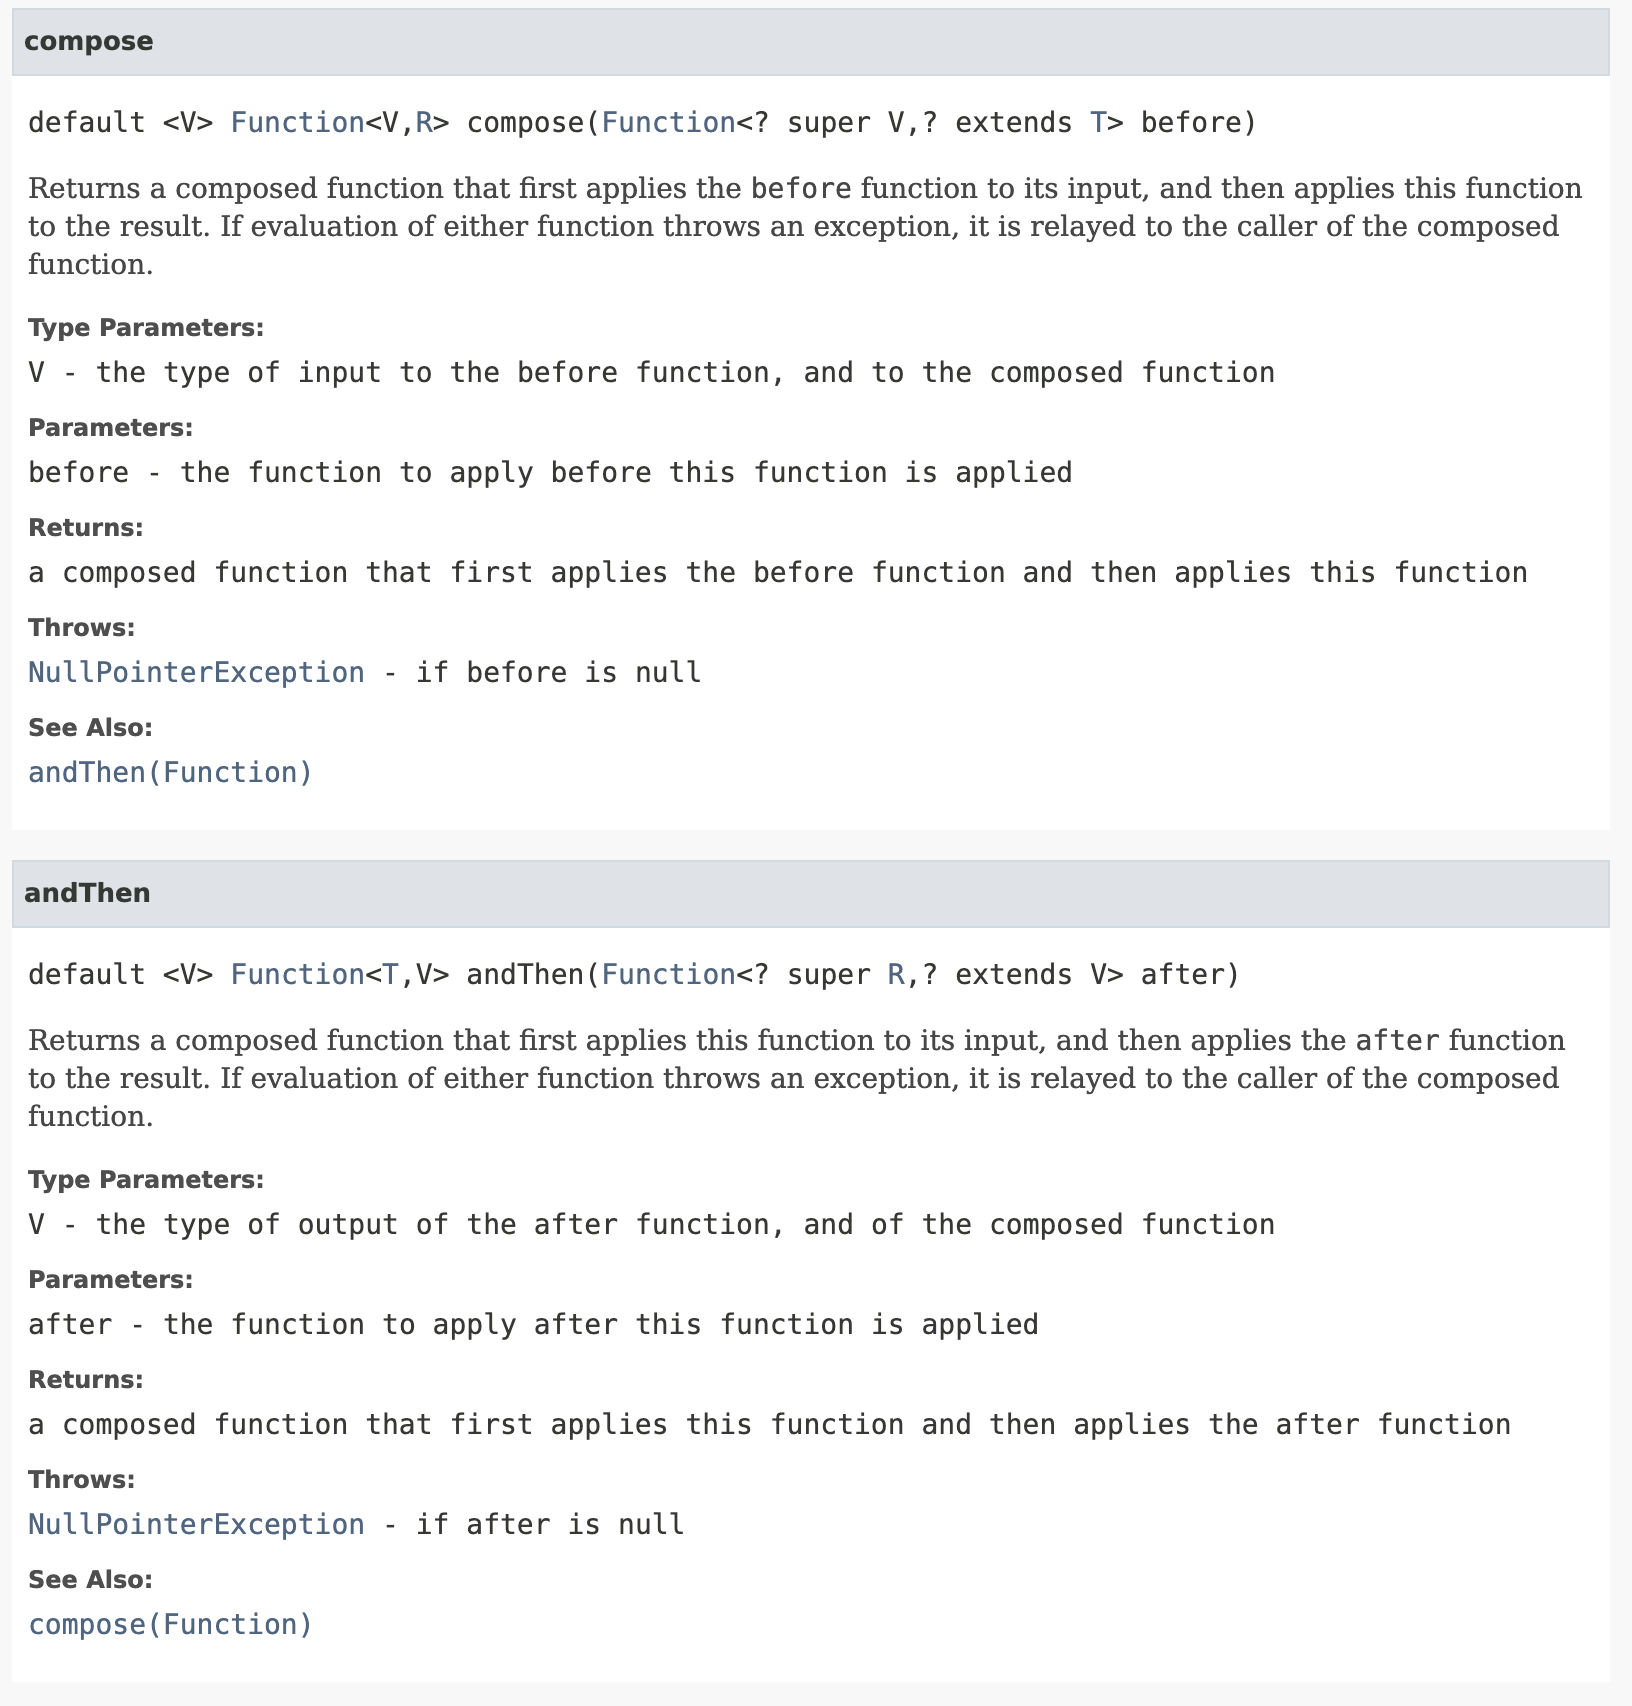
compose, andThen
Function에서 compose와 andThen을 이용해 함수를 조합할 수 있다.
compose 예제:
|
1
2
3
4
5
6
7
8
9
10
11
12
13
14
15
16
17
|
public class Foo {
public static void main(String[] args) {
Function<Integer, Integer> plus10 = (number) -> number + 10;
Function<Integer, Integer> multiply2 = (number) -> number * 2;
/*
* compose는 입력 값을 사용해 인자로 받은 함수에 적용을 한다
* 그 후 결과값을 리시버 객체의 입력값으로 사용한다.
* 이 예제의 경우 *2를 수행하고 +10을 한다 */
Function<Integer, Integer> multiply2AndPlus10 = plus10.compose(multiply2);
System.out.println(multiply2AndPlus10.apply(2));
}
}
|
cs |
andThen 예제:
|
1
2
3
4
5
6
7
8
9
10
11
12
13
|
public class Foo {
public static void main(String[] args) {
Function<Integer, Integer> plus10 = (number) -> number + 10;
Function<Integer, Integer> multiply2 = (number) -> number * 2;
/*
* andThen은 리시버 객체를 우선 수행한 후 인자로 받은 객체를 수행한다
* 이 예제의 경우 + 10을 수행하고 *2를 한다
*/
System.out.println(plus10.andThen(multiply2).apply(2));
}
}
|
cs |
BiFunction<T, U, R>
Function과 같으나 두개의 인자를 받는다. (T, U)
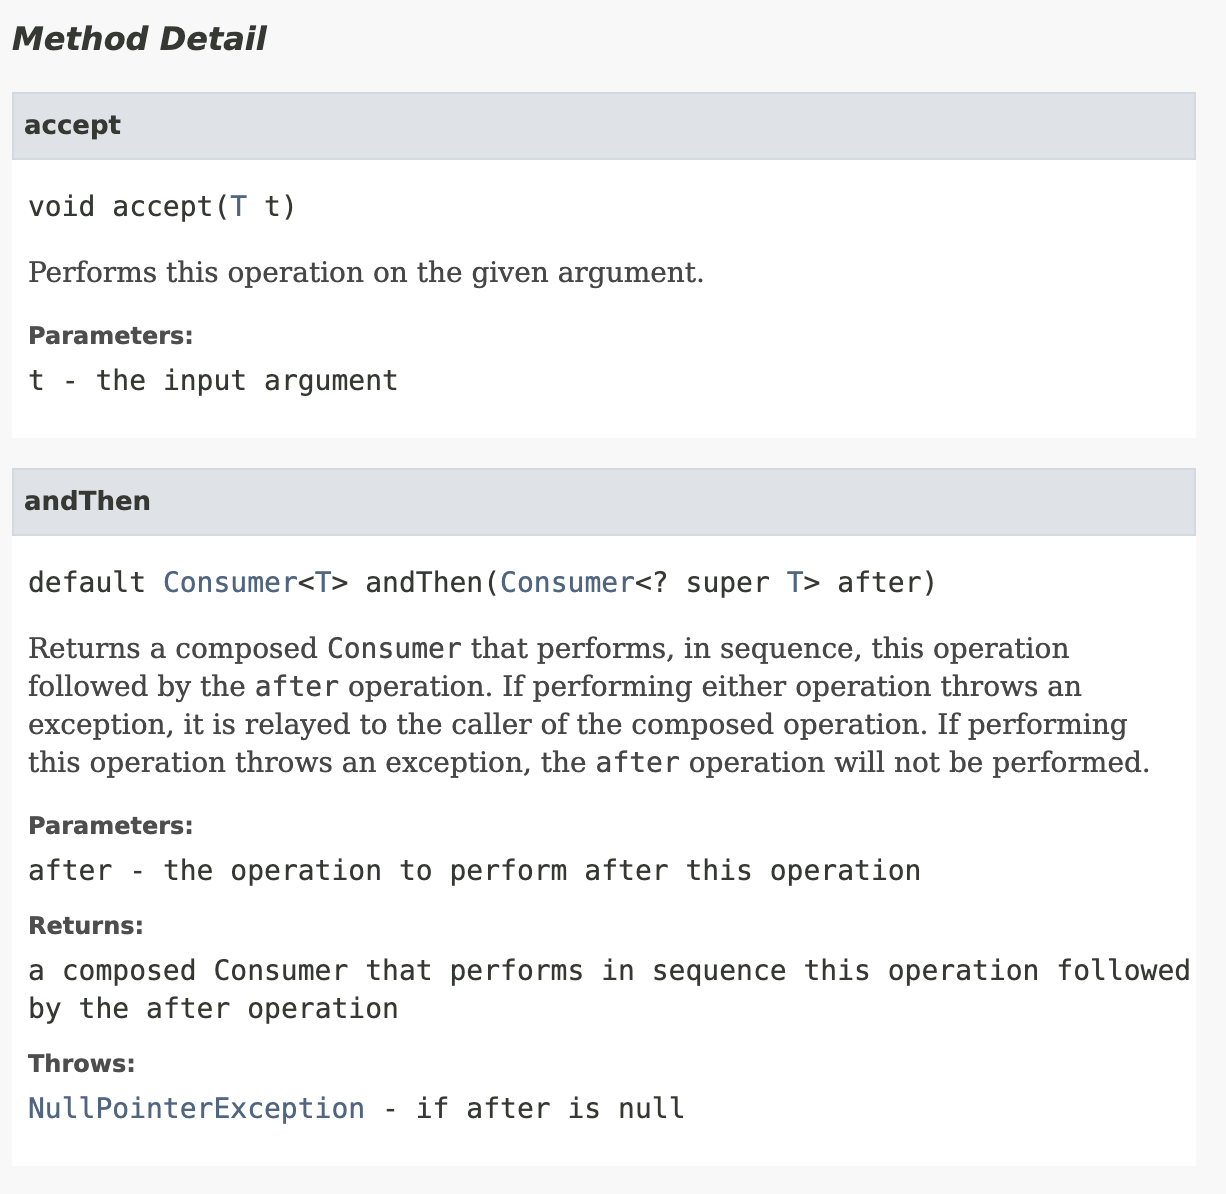
Consumer<T>
T타입의 인자를 받아서 아무것도 반환하지 않는다.
|
1
2
3
4
5
6
7
|
public class Foo {
public static void main(String[] args) {
Consumer<Integer> printT = (number) -> System.out.println(number);
printT.accept(10);
}
}
|
cs |
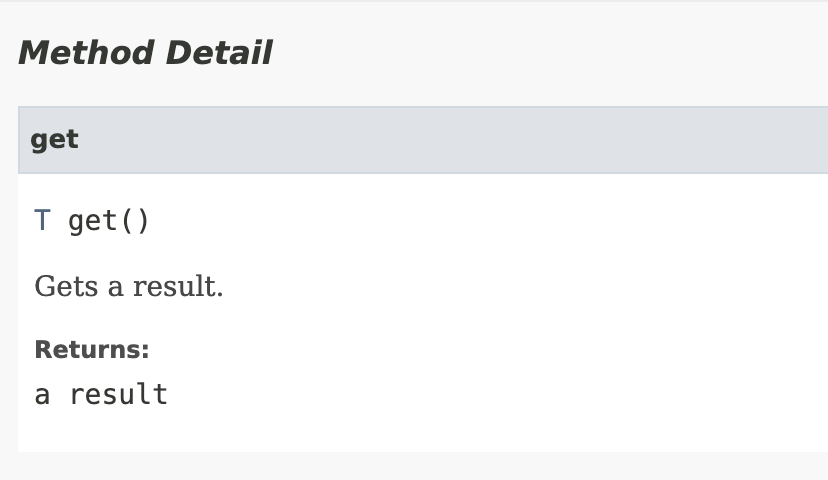
Supplier<T>
받아올 값을 정의한다.
|
1
2
3
4
5
6
7
|
public class Foo {
public static void main(String[] args) {
Supplier<Integer> get10 = () -> 10;
System.out.println(get10.get());
}
}
|
cs |
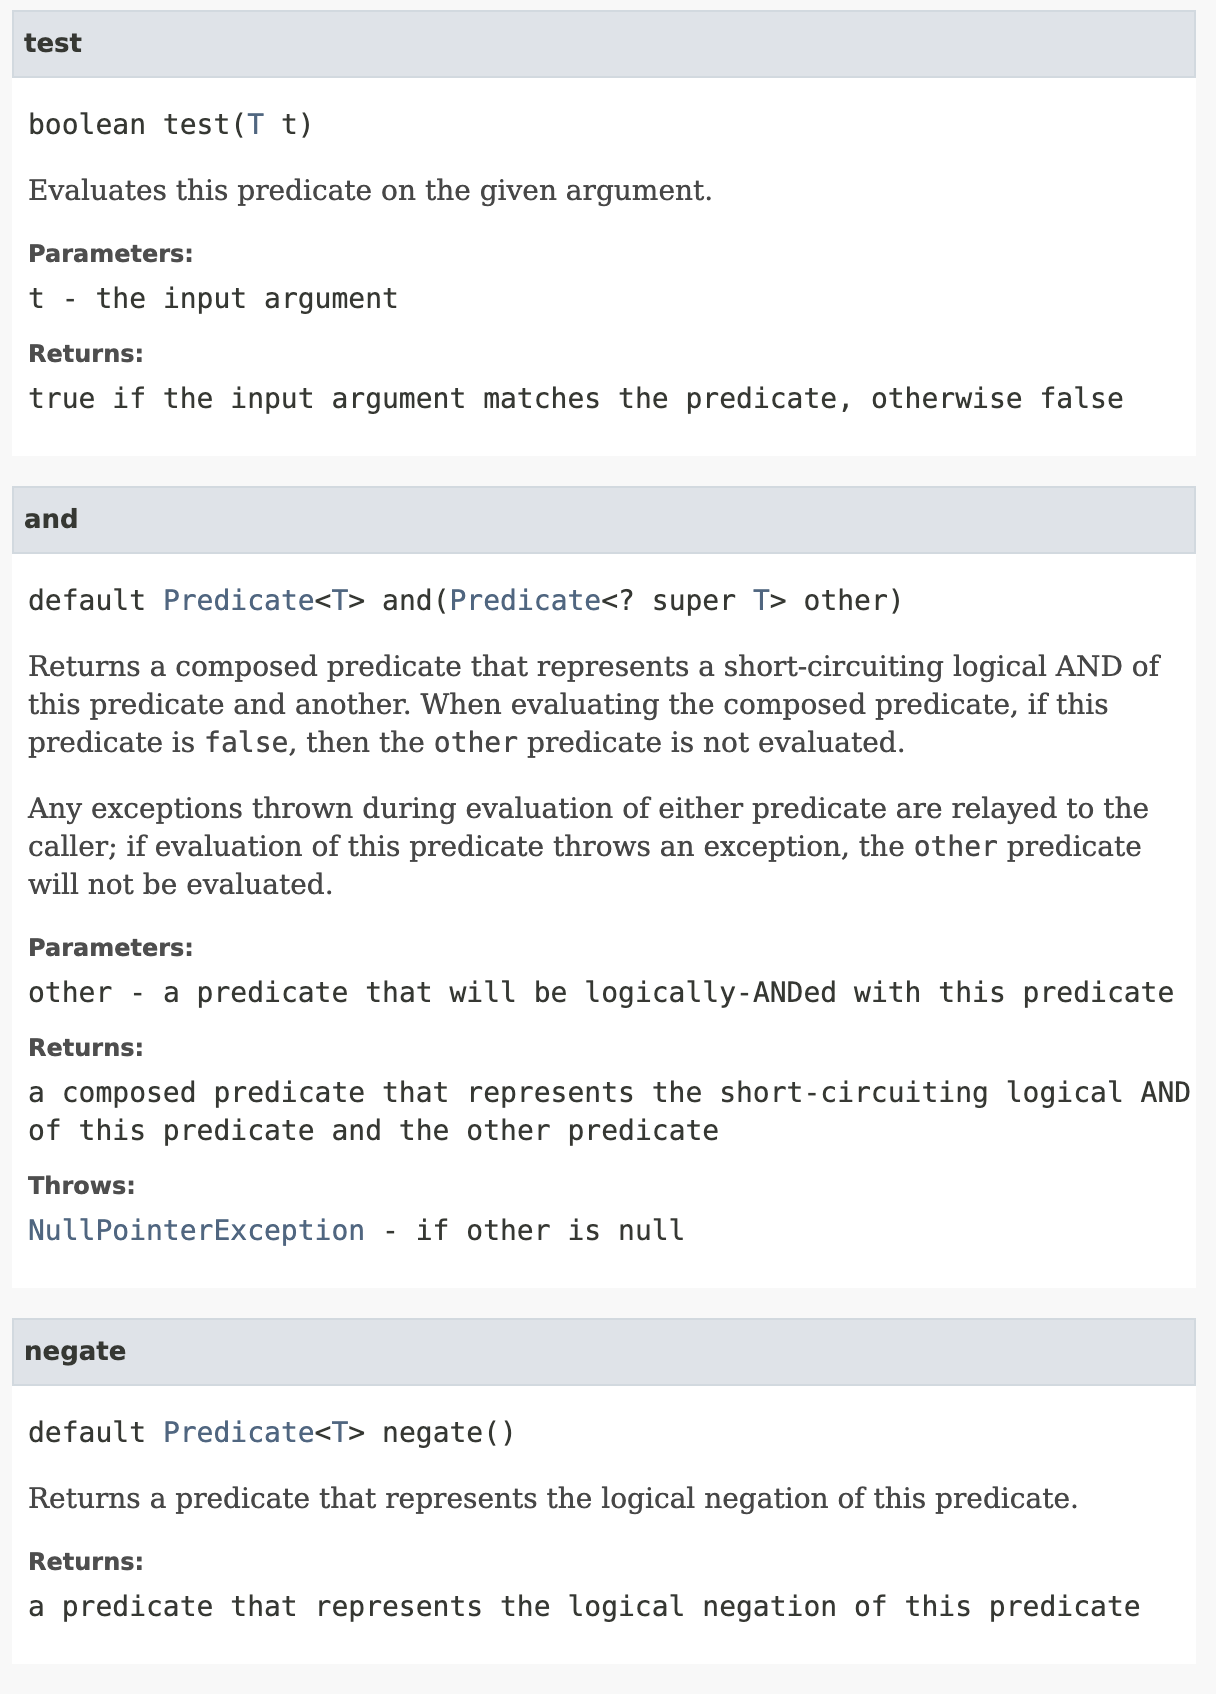
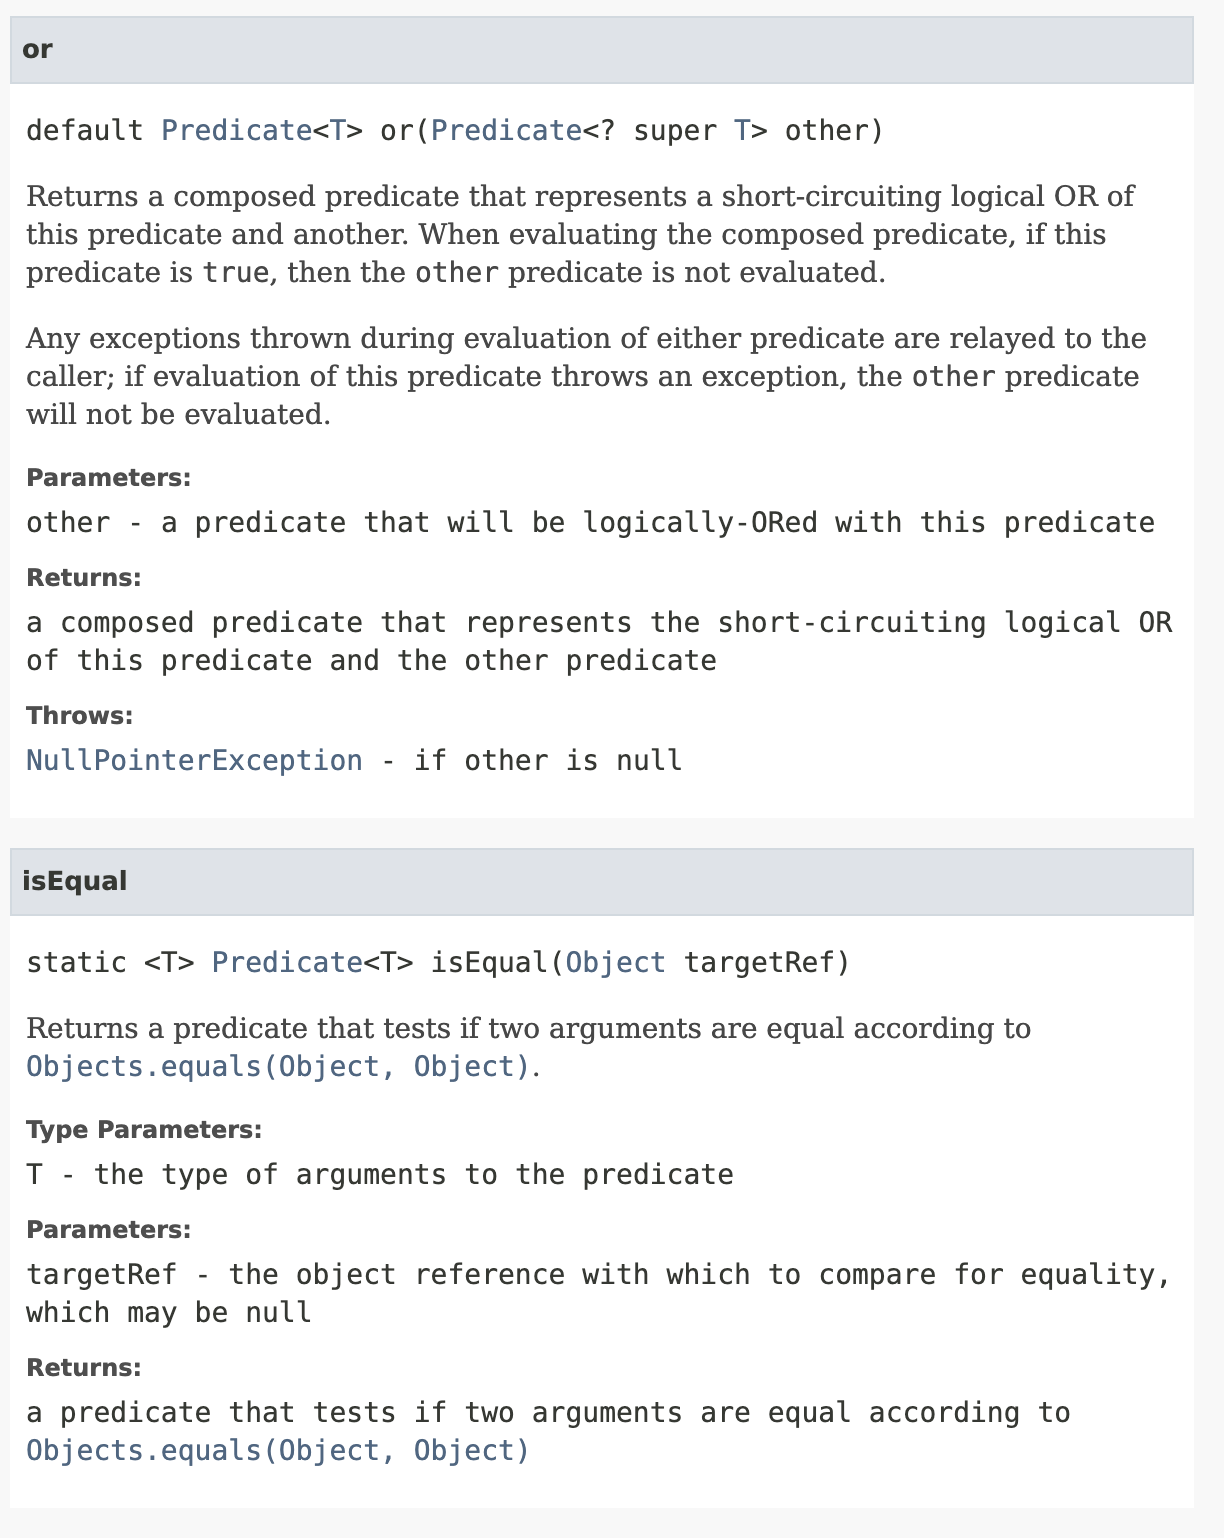
Predicate<T>
어떤 인자를 받아 true, flase를 반환한다.
|
1
2
3
4
5
6
7
8
9
|
public class Foo {
public static void main(String[] args) {
Predicate<String> startWithY = (s) -> s.startsWith("y");
Predicate<Integer> isOdd = (number) -> number % 2 != 0;
System.out.println(startWithY.test("ykk"));
System.out.println(isOdd.test(2));
}
}
|
cs |
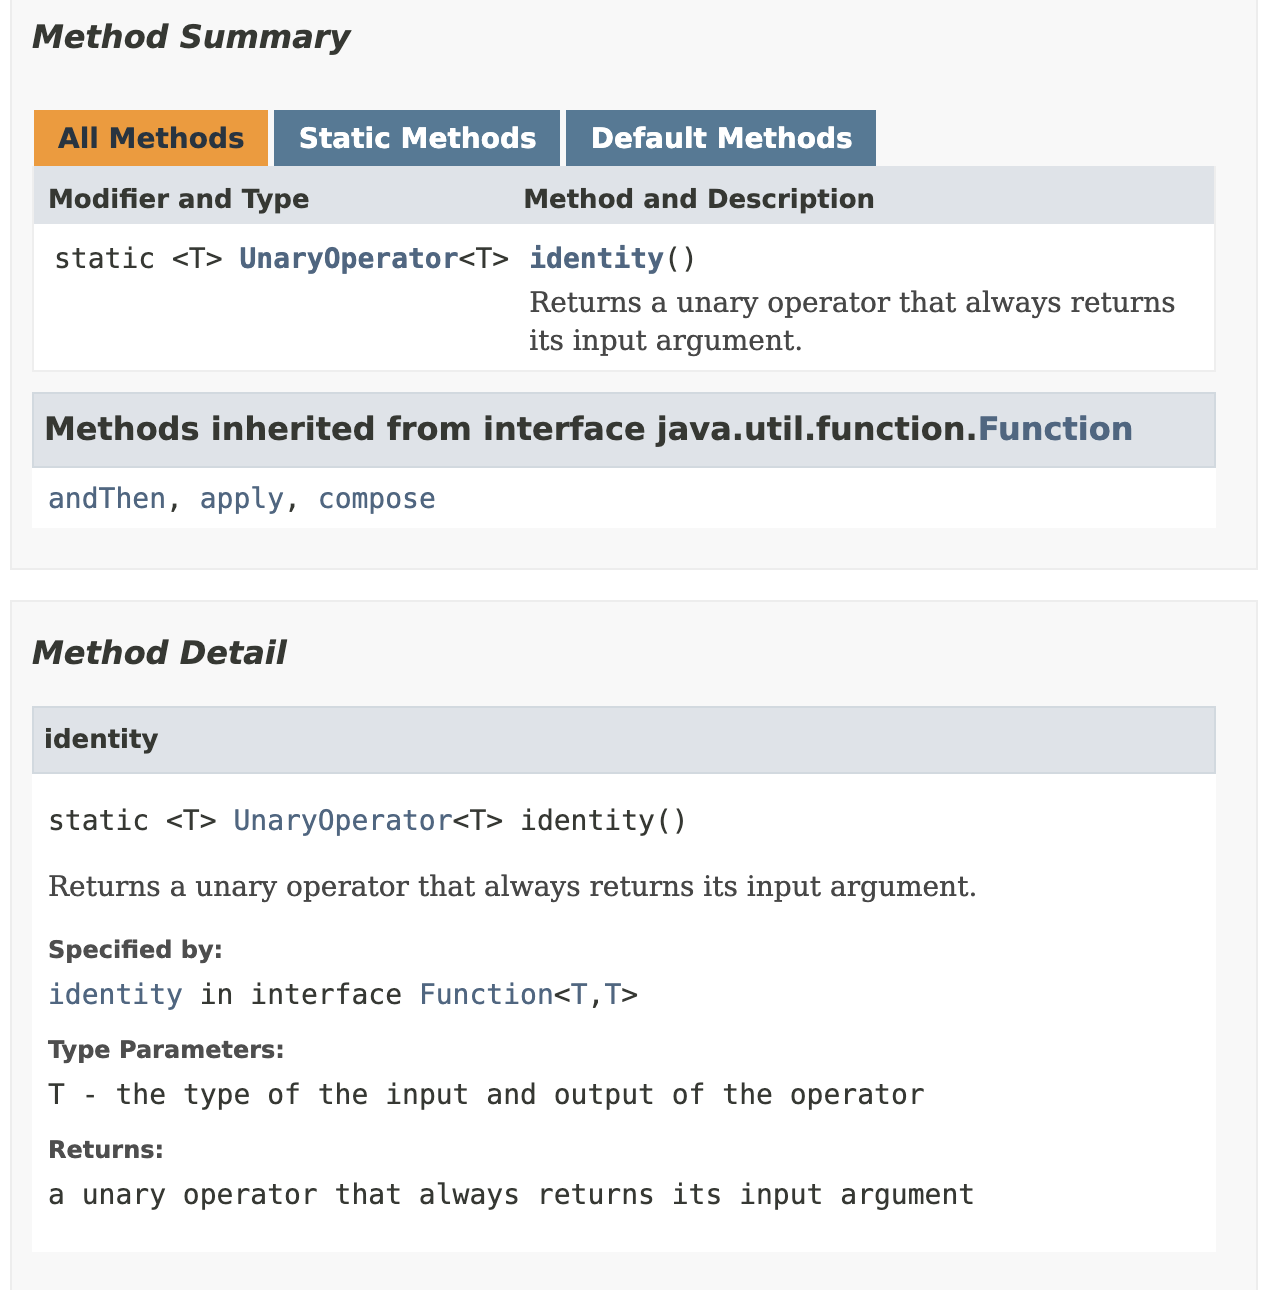
UnaryOperator<T>
Function의 특수한 케이스 이다. 받는 인자와 반환할 값의 타입이 같을 때 사용한다. UnaryOperator는 Function을 상속 받기 때문에 Function의 메서드를 사용할 수 있다.
|
1
2
3
4
5
6
7
8
9
|
public class Foo {
public static void main(String[] args) {
UnaryOperator<Integer> plus10 = (number) -> number + 10;
UnaryOperator<Integer> multiply2 = (number) -> number * 2;
System.out.println(plus10.andThen(multiply2).apply(2));
}
}
|
cs |
BinaryOperator<T>
BiFunction의 특수한 형태이다. 두개의 인자, 반환값의 타입이 모두 같을때 사용하면 된다.
람다 변수 캡쳐
다음과 같이 지역 클래스, 익명클래스, 람다가 존재한다고 해보자
|
1
2
3
4
5
6
7
8
9
10
11
12
13
14
15
16
17
18
19
20
21
22
23
24
25
26
27
28
29
30
|
public class Foo {
private void run() {
int baseNumber = 10;
//local class
class LocalClass {
void printBaseNumber() {
System.out.println(baseNumber);
}
}
//anonymous class
Consumer<Integer> integerConsumer = new Consumer<Integer>() {
@Override
public void accept(Integer integer) {
System.out.println(baseNumber);
}
};
IntConsumer printInt = (number) -> System.out.println(number + baseNumber);
printInt.accept(10);
}
public static void main(String[] args) {
Foo foo = new Foo();
foo.run();
}
}
|
cs |
여기서 지역 클래스, 익명클래스, 람다는 자신들의 스코프 밖에 있는 baseNumber를 사용하고 있다. 이 셋은 변수가 final, 또는 effective final(final로 선언하지는 않았지만 변수를 변경하지 않는 경우)일 경우 변수를 자신들 내부에서 사용할 수 있다.
하지만 지역클래스, 익명클래스는 shadowing이 되는 반면 람다는 shadowing이 되지 않는다. 즉, nested class는 자신들의 scope 내에서 외부 변수와 이름이 같은 변수를 선언하면 자신의 스코프에 있는 변수로 덮어 씌워 지지만 람다는 그렇지 않다.
|
1
2
3
4
5
6
7
8
9
10
11
12
13
14
15
16
17
18
19
20
21
22
23
24
25
26
27
28
29
30
31
32
|
public class Foo {
private void run() {
int baseNumber = 10;
// local class
class LocalClass {
void printBaseNumber() {
int baseNumber = 11;
System.out.println(baseNumber); // 11
}
}
// anonymous class
Consumer<Integer> integerConsumer = new Consumer<Integer>() {
@Override
public void accept(Integer baseNumber) {
System.out.println(baseNumber); // 인자로 전달한 baseNumber
}
};
// Variable 'baseNumber' is already defined in the scope
IntConsumer printInt = (baseNumber) -> System.out.println(baseNumber);
printInt.accept(10);
}
public static void main(String[] args) {
Foo foo = new Foo();
foo.run();
}
}
|
cs |
메소드 레퍼런스
위 코드에서는 모든 람다를 인라인으로 직접 구현했다. 하지만 기존 코드에 동일한 메서드가 존재할 경우 해당 메서드를 참조할 수 있다.
|
1
2
3
4
5
6
7
8
9
10
11
12
13
14
15
16
17
18
19
20
21
22
23
24
25
|
public class App {
public static void main(String[] args) {
// static method를 람다 메서드 레퍼런스로 사용할 경우
UnaryOperator<String> hi = Greeting::hi;
// 일반 method를 람다 메서드 레퍼런스로 사용할 경우
Greeting greeting = new Greeting();
UnaryOperator<String> hello = greeting::hello;
// 생성자를 람다 메서드 레퍼런스로 사용할 경우
// 인자로 String name을 받는 생성자 사용
Function<String, Greeting> yunkiGreeting = Greeting::new;
Greeting yunki = yunkiGreeting.apply("yunki");
System.out.println(yunki.getName());
//기본 생성자 사용
Supplier<Greeting> newGreeting = Greeting::new;
// 특정 타입의 불특정다수 인스턴스의 메서드 참조
String[] names = {"yunki", "toby", "js"};
Arrays.sort(names, String::compareToIgnoreCase);
System.out.println(Arrays.toString(names));
}
}
|
cs |
여기서 주의해야할 점은 메소드 레퍼런스는 해당 메서드를 호출하는 것이 아니라 단지 참조만 한다는 것이다.