Concurrent software는 동시에 여러 작업을 할 수 있는 소프트웨어이다.
자바에서는 다음과 같은 concurrent programming을 지원한다
1. multi processing
2. multi thread
자바는 멀티쓰레딩을 설정하지 않는 한 기본적으로 main thread에서 동작한다.
자바에서 multi thread를 사용할려면 다음과 같은 방식을 사용하면 된다.
|
1
2
3
4
5
6
7
8
9
10
11
12
13
14
15
16
17
18
19
|
public class App {
//클래스를 만들어서 사용하는
public static void main(String[] args) {
MyThread myThread = new MyThread();
myThread.start();
System.out.println("Hello " + Thread.currentThread().getName());
}
static class MyThread extends Thread {
@Override
public void run() {
System.out.println("Thread" + Thread.currentThread().getName());
}
}
}
|
cs |
|
1
2
3
4
5
6
7
8
9
10
11
12
|
public class App {
//runnable, 람다 사용
public static void main(String[] args) {
Thread thread = new Thread(() -> {
System.out.println("Thread: " + Thread.currentThread().getName());
});
thread.start();
System.out.println("Hello: " + Thread.currentThread().getName()); }
}
|
cs |
thread 중지 시키기
|
1
2
3
4
5
6
7
8
9
10
11
12
13
14
15
16
17
18
19
20
21
|
public class App {
//클래스를 만들어서 사용하는 방법
public static void main(String[] args) {
Thread thread = new Thread(() -> {
try {
//thread를 인자로 넘긴 시간만큼 중지된다
Thread.sleep(1000L);
} catch (InterruptedException e) {
//sleep을 하는 도중 thread를 시작시키면 에러 발생
e.printStackTrace();
}
System.out.println("Thread: " + Thread.currentThread().getName());
});
thread.start();
System.out.println("Hello: " + Thread.currentThread().getName());
}
}
|
cs |
thread 재시작,thread 종료
|
1
2
3
4
5
6
7
8
9
10
11
12
13
14
15
16
17
18
19
20
21
22
23
24
|
public class App {
//클래스를 만들어서 사용하는 방법
public static void main(String[] args) {
Thread thread = new Thread(() -> {
while(true) {
System.out.println("Thread: " + Thread.currentThread().getName());
try {
Thread.sleep(1000L);
} catch (InterruptedException err) {
//thread를 재시작 시키면 종료
System.out.println("interrupted");
return;
}
}
});
thread.start();
System.out.println("Hello: " + Thread.currentThread().getName());
Thread.sleep(3000L);
// sleep된 thread를 재시작시킨다
thread.interrupt(); }
}
|
cs |
thread하나가 종료될때 까지 기다리기 (join)
|
1
2
3
4
5
6
7
8
9
10
11
12
13
14
15
16
17
|
public static void main(String[] args) throws InterruptedException {
Thread thread = new Thread(() -> {
System.out.println("Thread: " + Thread.currentThread().getName());
try {
Thread.sleep(3000L);
} catch (InterruptedException err) {
throw new IllegalStateException(err);
}
});
thread.start();
System.out.println("Hello: " + Thread.currentThread().getName());
//위에서 생성한 thread가 끝날때 까지 다른 thread는 동작을 멈춘다.
thread.join();
//thread가 끝나는 3초뒤 이 라인이 실행된다.
System.out.println(thread + " is finished");
}
|
cs |
Executors
Thread를 관리하는 것을 위의 방식 보다는 좀 더 고수준 API에게 위임한다. Executor는 다음과 같은 일을 한다
1. Thread를 생성한다: 애플리케이션이 상요할 thread pool을 만들어 관리한다
2. Thread 관리: thread 생명주기를 관리한다
3. 작업 처리, 실행: thread로 실행할 작업을 제공할 수 있는 API를 제공한다.
Executor를 직접 사용해도 되지만 좀 더 다양한 작업을 제공하는 ExecutorService를 더 많이 사용한다. 또 한 ExecutorService를 상속받는 ScheduledExecutorService역시 존재한다. 이는 특정 주기로 어떤 작업을 실행하거나 또는 어떤 작업을 delay했다가 시작할때 사용된다.
ExecutorService는 명시적으로 종료시킬때 까지 대기를 하기때문에 작업이 끝나면 반드시 종료를 해줘야 한다. 이는 ExecutorService.shutdown()이라는 메서드를 사용하고 이 메서드는 graceful shutdown을 한다(현재 진핸중인 작업을 완전히 끝내고 종료한다). 만약 graceful shutdown()을 하고싶지 않다면 ExecutorService.shutdoenNow()를 사용하면 된다.
|
1
2
3
4
5
6
7
|
public static void main(String[] args) throws InterruptedException {
ExecutorService executorService = Executors.newSingleThreadExecutor();
executorService.submit(() -> {
System.out.println("Thread: " + Thread.currentThread().getName());
});
executorService.shutdown();
}
|
cs |
만약 thread의 갯수 보다 해야 하는 task의 갯수가 많을 경우 thread는 각자 task를 하나씩 가져가 처리한다. 이때 남는 task는 blocking queue에 저장된다. 그 후 thread하나가 task하나를 끝낼때 마다 blocking queue는 task를 작업을 끝낸 thread에 할당한다.
|
1
2
3
4
5
6
7
8
9
10
11
12
13
14
|
public static void main(String[] args) {
//thread가 2개인 thread pool
ExecutorService executorService = Executors.newFixedThreadPool(2);
executorService.submit(getRunnable("hello0"));
executorService.submit(getRunnable("hello1"));
executorService.submit(getRunnable("hello2"));
executorService.submit(getRunnable("hello3"));
executorService.submit(getRunnable("hello4"));
executorService.shutdown();
}
private static Runnable getRunnable(String message) {
return () -> System.out.println(message + Thread.currentThread().getName());
}
|
cs |
ScheduledExecutorService
|
1
2
3
4
5
6
7
8
9
10
|
public static void main(String[] args) {
ScheduledExecutorService executorService = Executors.newSingleThreadScheduledExecutor();
//3초를 기다린 후에 실행
executorService.schedule(getRunnable("hello"), 3, TimeUnit.SECONDS);
executorService.shutdown();
}
private static Runnable getRunnable(String message) {
return () -> System.out.println(message + Thread.currentThread().getName());
}
|
cs |
|
1
2
3
4
5
6
7
8
|
public static void main(String[] args) {
ScheduledExecutorService executorService = Executors.newSingleThreadScheduledExecutor(); //처음에는 1초 delay를 하고 그 다음부터 2초 주기로 실행
executorService.scheduleAtFixedRate(getRunnable("hello"), 1, 2, TimeUnit.SECONDS);
}
private static Runnable getRunnable(String message) {
return () -> System.out.println(message + Thread.currentThread().getName());
}
|
cs |
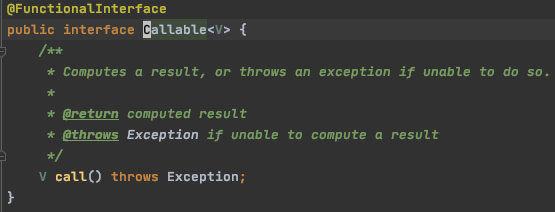
Callable
Runnable은 반환값이 void이다
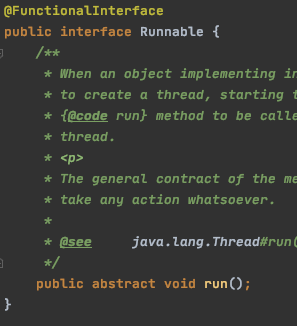
따라서 thread에서 임의의 task를 수행한 후 결과를 반환해야 한다면 Runnable이 아닌 Callable을 사용해야 한다. Callable은 Runnable과 비슷하지만 값을 반환할 수 있다는 차이가 존재한다.
|
1
2
3
4
5
6
7
8
9
10
11
12
13
14
15
16
17
18
19
20
21
22
23
24
25
26
27
28
29
|
public static void main(String[] args) throws ExecutionException, InterruptedException {
ExecutorService executorService = Executors.newSingleThreadScheduledExecutor();
Callable<String> hello = () -> {
Thread.sleep(2000L);
return "hello";
};
//Callable의 반환값은 Future를 사용해 가져온다
Future<String> submit = executorService.submit(hello);
//isDone()은 현재 thread의 작업이 끝났으면 true, 아니면 false
System.out.println(submit.isDone());
System.out.println("Thread");
//cancel()을 통해 현재 thread를 interrupt하고 종료한다
//인자로 true를 주면 곧바로 종료시키고
//인자로 false를 주면 하던 작업을 마무리 하고 종료한다.
//하지만 어떤식으로 종료를 하던 강제로 종료한 것이기 때문에 반환값을 가져올 수 없다.
//cancel을 하면 isDone()은 true가 된다.
System.out.println(submit.cancel(true));
//get()이전까지는 그냥 실행되고
//get() 부터는 thread가 작업을 끝나기를 기다린다
submit.get();
System.out.println(submit.isDone());
executorService.shutdown();
}
|
cs |
Callable의 invokeAny, invokeAll 예제
|
1
2
3
4
5
6
7
8
9
10
11
12
13
14
15
16
17
18
19
20
21
22
23
24
25
26
27
28
29
30
31
32
33
34
35
36
37
|
public static void main(String[] args) throws ExecutionException, InterruptedException {
ExecutorService executorService = Executors.newFixedThreadPool(4);
Callable<String> hello = () -> {
Thread.sleep(2000L);
return "hello";
};
Callable<String> java = () -> {
Thread.sleep(3000L);
return "Java";
};
Callable<String> keesun = () -> {
Thread.sleep(1000L);
return "keesun";
};
//incokeAll을 사용해 Future의 리스트를 만든다.
//invokeAll은 입력한 Callable이 모두 종료될때 까지 기다린다.
//따라서 결과값이 한번에 나온다.
List<Future<String>> futures = executorService.invokeAll(
Arrays.asList(hello, java, keesun)
);
futures.forEach((future) -> {
try {
System.out.println(future.get());
} catch (InterruptedException | ExecutionException e) {
e.printStackTrace();
}
});
//invokeAny는 입력한 Callable를 수행하되 하나만 완료되면 해당 값만 반환하고 종료한다.
String s = executorService.invokeAny(Arrays.asList(hello, java, keesun));
System.out.println(s);
executorService.shutdown();
}
|
cs |
CompletableFuture
위에서 다루었던 Futre는 예외처리를 할 수 없고 Future.get()을 하기 전까지는 아무런 작업을 할 수 없다. Future.get()은 blocking call이기 때문에 이 작업이 끝나야 결과값을 가지고 어떤 로직을 수행할 수 있다.
CompletableFuture는 외부에서 complete를 시킬 수 있다.
반환값이 필요 없는 경우 예제
|
1
2
3
4
5
6
7
8
|
public static void main(String[] args) throws ExecutionException, InterruptedException {
CompletableFuture<Void> future = CompletableFuture.runAsync(() -> {
System.out.println("hello " + Thread.currentThread().getName());
});
System.out.println(future.get());
future.get();
}
|
cs |
반환값이 있는 경우 예제
|
1
2
3
4
5
6
|
public static void main(String[] args) throws ExecutionException, InterruptedException {
CompletableFuture<String> future = CompletableFuture.supplyAsync(() -> { System.out.println("hello " + Thread.currentThread().getName());
return "Hello";
});
System.out.println(future.get());
}
|
cs |
CompleteableFuture을 사용하면 callback을 사용할 수 있다.
반환값이 있는 경우 예제
|
1
2
3
4
5
6
7
8
9
10
|
public static void main(String[] args) throws ExecutionException, InterruptedException {
CompletableFuture<String> future = CompletableFuture.supplyAsync(() -> {
System.out.println("hello " + Thread.currentThread().getName());
return "Hello";
}).thenApply((string) -> {
System.out.println(Thread.currentThread().getName());
return string.toUpperCase();
});
System.out.println(future.get());
}
|
cs |
반환값이 없는 경우 예제:
|
1
2
3
4
5
6
7
8
9
|
public static void main(String[] args) throws ExecutionException, InterruptedException {
CompletableFuture<Void> future = CompletableFuture.supplyAsync(() -> {
System.out.println("hello " + Thread.currentThread().getName());
return "Hello";
}).thenAccept((string) -> {
System.out.println(Thread.currentThread().getName());
});
System.out.println(future.get());
}
|
cs |
반환값이 없고 결과 조차 참조를 안해도 되는 경우 예제:
|
1
2
3
4
5
6
7
8
|
public static void main(String[] args) throws ExecutionException, InterruptedException {
CompletableFuture<Void> future = CompletableFuture.supplyAsync(() -> { System.out.println("hello " + Thread.currentThread().getName());
return "Hello";
}).thenRun(() -> {
System.out.println(Thread.currentThread().getName());
});
System.out.println(future.get());
}
|
cs |
위예제의 경우 thread pool을 만들지 않고도 다른 thread를 사용했다. 이게 가능한 이유는 ForkJoinPool때문이다. ForkJoinPool은 executor를 구현한 구현체의 한 종류이다. 이는 deque를 사용하고 thread가 task가 없으면 직접 이 deque에서 task를 가져와 수행한다. 만약 thread자신이 파생시킨 sub-task가 존재한다면 sub-task를 다른 thread에 분산시켜 작업을 하고 마지막에 join을 한다. 따라서 별도로 executor를 사용하지 않아도 ForkJoinPool내부에 있는 common pool을 사용한다.
Executor를 별도로 생성해 사용하는 방법은 다음과 같다
|
1
2
3
4
5
6
7
8
9
10
|
public static void main(String[] args) throws ExecutionException, InterruptedException {
ExecutorService executorService = Executors.newFixedThreadPool(4);
CompletableFuture<Void> future = CompletableFuture.supplyAsync(() -> {
System.out.println("hello " + Thread.currentThread().getName());
return "Hello";
}, executorService).thenRun(() -> {
System.out.println(Thread.currentThread().getName());
});
System.out.println(future.get());
}
|
cs |
CompletableFuture로 작업 조합
Future는 콜백이 없기 때문에 여러 작업을 연결할 수 없었다.
|
1
2
3
4
5
6
7
8
9
10
11
12
13
14
|
public static void main(String[] args) throws ExecutionException, InterruptedException {
CompletableFuture<String> hello = CompletableFuture.supplyAsync(() -> {
System.out.println("Hello " + Thread.currentThread().getName());
return "Hello";
});
CompletableFuture<String> world = CompletableFuture.supplyAsync(() -> {
System.out.println("World " + Thread.currentThread().getName());
return "World";
});
System.out.println(hello.get());
System.out.println(world.get());
}
|
cs |
위 예제 같이 Hello다음에 World를 출력하기 위해서는 helllo.get()을 한 뒤 그 다음에 world.get()을 해야 했다. 하지만 다음과 같이 thenCompose()를 사용해 작업을 compose할 수 있다. 이 방식은 두개의 future간에 의존성이 있을때 사용된다.
|
1
2
3
4
5
6
7
8
9
10
11
12
13
14
15
16
|
public static void main(String[] args) throws ExecutionException, InterruptedException {
CompletableFuture<String> hello = CompletableFuture.supplyAsync(() -> {
System.out.println("Hello " + Thread.currentThread().getName());
return "Hello";
});
CompletableFuture<String> future = hello.thenCompose(App::getWorld);
System.out.println(future.get());
}
private static CompletableFuture<String> getWorld(String message) {
return CompletableFuture.supplyAsync(() -> {
System.out.println(message + Thread.currentThread().getName());
return message + "World";
});
}
|
cs |
만약 두개의 future간에 의존성이 없다면 다음과 같은 방식을 사용할 수 있다. 이 방식은 thenCombine()을 사용한다. thenCombine()은 biFunction을 사용해 두 개의 task가 끝나면 이를 합쳐서 반환한다.
|
1
2
3
4
5
6
7
8
9
10
11
12
13
14
15
16
|
public static void main(String[] args) throws ExecutionException, InterruptedException {
CompletableFuture<String> hello = CompletableFuture.supplyAsync(() -> {
System.out.println("Hello " + Thread.currentThread().getName());
return "Hello";
});
CompletableFuture<String> world = CompletableFuture.supplyAsync(() -> {
System.out.println("World " + Thread.currentThread().getName());
return "World";
});
CompletableFuture<String> future = hello.thenCombine(world,
(helloResult, worldResult) -> helloResult + " " + worldResult
);
System.out.println(future.get());
}
|
cs |
만약 두개 이상의 task가 모두 끝난다음에 수행해야할 로직이 있다면 allOf()를 사용하면 된다. 하지만 이를 통해서 특정 결과를 가져올 수 없다. 그 이유는 allOf()인자로 넘기는 모든 task의 결과가 모두 같은 type이라는 보장이 없기 때문이다. 또 한 에러가 발생했을 수 도 있다. 그렇기 때문에 null이 반환된다.
|
1
2
3
4
5
6
7
8
9
10
11
12
13
14
15
16
17
|
public static void main(String[] args) throws ExecutionException, InterruptedException {
CompletableFuture<String> hello = CompletableFuture.supplyAsync(() -> {
System.out.println("Hello " + Thread.currentThread().getName());
return "Hello";
});
CompletableFuture<String> world = CompletableFuture.supplyAsync(() -> {
System.out.println("World " + Thread.currentThread().getName());
return "World";
});
CompletableFuture<Void> future = CompletableFuture.allOf(hello, world)
.thenAccept(System.out::println); // null
System.out.println(future.get()); // null
}
|
cs |
따라서 두개 이상의 task를 수행해야 한다면 다음과 같은 방식을 사용해야 한다.
|
1
2
3
4
5
6
7
8
9
10
11
12
13
14
15
16
17
18
19
20
21
22
23
|
public static void main(String[] args) throws ExecutionException, InterruptedException {
CompletableFuture<String> hello = CompletableFuture.supplyAsync(() -> {
System.out.println("Hello " + Thread.currentThread().getName());
return "Hello";
});
CompletableFuture<String> world = CompletableFuture.supplyAsync(() -> {
System.out.println("World " + Thread.currentThread().getName());
return "World";
});
List<CompletableFuture> futures = Arrays.asList(hello, world);
CompletableFuture[] futuresArray = futures.toArray(new CompletableFuture[futures.size()]);
CompletableFuture<List<Object>> future = CompletableFuture.allOf(futuresArray)
.thenApply(result -> futures.stream()
.map(CompletableFuture::join) // Future에서 반환하는 최종 결과값이 나온다.
.collect(Collectors.toList())); // 결과값을 리스트로 만든다
future.get()
.forEach(System.out::println);
}
|
cs |
여러 task중 어느 하나가 끝나면 해당 값을 반환하는 방식은 다음과 같다.
|
1
2
3
4
5
6
7
8
9
10
11
12
13
14
15
16
|
public static void main(String[] args) throws ExecutionException, InterruptedException {
CompletableFuture<String> hello = CompletableFuture.supplyAsync(() -> {
System.out.println("Hello " + Thread.currentThread().getName());
return "Hello";
});
CompletableFuture<String> world = CompletableFuture.supplyAsync(() -> {
System.out.println("World " + Thread.currentThread().getName());
return "World";
});
CompletableFuture<Void> future = CompletableFuture.anyOf(hello, world)
.thenAccept(System.out::println);
future.get();
}
|
cs |
CompletableFuture에러 처리
CompletableFuture에서는 다음과 같은 방식을 사용해 에러처리를 한다
|
1
2
3
4
5
6
7
8
9
10
11
12
13
14
15
16
|
public static void main(String[] args) throws ExecutionException, InterruptedException {
boolean throwError = true;
CompletableFuture<String> hello = CompletableFuture.supplyAsync(() -> {
if(throwError) {
throw new IllegalArgumentException();
}
System.out.println("Hello " + Thread.currentThread().getName());
return "hello";
}).exceptionally(ex -> {
System.out.println(ex);
return "Error";
});
System.out.println(hello.get());
}
|
cs |
또 한 handle()을 사용할 수 도 있다.
|
1
2
3
4
5
6
7
8
9
10
11
12
13
14
15
16
17
18
|
public static void main(String[] args) throws ExecutionException, InterruptedException {
boolean throwError = true;
CompletableFuture<String> hello = CompletableFuture.supplyAsync(() -> {
if(throwError) {
throw new IllegalArgumentException();
}
System.out.println("Hello " + Thread.currentThread().getName());
return "hello";
}).handle((result, ex) -> {
if(ex != null) {
System.out.println(ex);
return "Error";
}
return result;
});
System.out.println(hello.get());
}
|
cs |